Why choose your own SAPUI5 Custom Controls?

The more SAPUI5 applications you develop, the more you get to know the limitations and restrictions. These are either the SAP Fiori Guidelines or the controls themselves. We quickly receive the statement in a client project: “Can’t this be implemented somehow?” Here, the quick answer is often that this is too expensive or not possible.

However, this does not have to be the case! Anyone who has ever dealt with SAPUI5 Custom Controls can quickly assess which requirements can be realised in no time at all, despite in-house development.

Don't Just Get Started

The first and most important to-do in client projects should be to inform those responsible that this particular requirement cannot be solved with standard SAP tools. Since companies often have policies regarding custom development, this needs to be clarified before starting the development of the Custom Control.

It also makes sense to provide information about the risks and consequences. Depending on which functionality the Custom Control provides or which existing controls it enhances, the functionality must be ensured during a SAPUI5 version upgrade. In the worst case, adjustments must be made to the SAPUI5 Custom Control so that it looks or behaves identically with the new SAPUI5 version.

Once the formalities have been taken care of, it’s time for the actual work. Here, it is important to understand exactly what is required of in-house development. The basics of creating SAPUI5 Custom Controls are highlighted below. In our next blog post, we will present two examples from our customer projects.

How to Create SAPUI5 Custom Controls

A Custom Control is initially very similar to a controller. The upper part defines which other controls are required or which files are to be imported. Based on one of the transferred controls, an extension is built using the “extend” function.

SAPUI5 Custom Controls

If no suitable control can be found that can be extended, the sap.ui.core.Control is used. This control is the basis for all other controls. The name of the Custom Control is composed of the namespace of the app and a specific name. To avoid confusion, the js file should also have the same name.
Another object is passed to the “extend” function where, for example, new properties or events can be defined. The important thing with any custom control is that the “renderer” function is present. The “renderer” function of the control to be expanded is often useful here. Alternatively, this must be written yourself (both types will be taken up in the further blog post).

Use of a SAPUI5 Custom Control

If the Custom Control is to be used within the view, the path and an abbreviation must first be defined, as with an additional SAPUI5 library.

In this example, there is a folder in the root path called “controls”. Inside this folder is a MyCustomControl.js file that mirrors the custom control. Within the XML, all inherited as well as all new properties, events, aggregations and associations are available. It can therefore be used like a normal control of the SAPUI5 library.

Adding More Properties

If a Custom Control requires another property, this is defined within the properties object. In the following example, the property is called “secondText” and is of the type “string”. A defaultValue can also be defined, which is an empty string here.

The familiar SAPUI5 types are available for properties:
  • string
  • boolean
  • int
  • float
  • any
  • object
  • arrays, for example string[]
  • spe­cial SAPUI5 types like “sap.ui.core.CSSSize” or other Con­trols
The DefaultValue is not a mandatory field and can therefore be left blank. The SAPUI5 framework automatically generates setter and getter methods from the new property. These can be used both within the Custom Control and within a controller. In our example, the generated methods are called setSecondText and getSecondText.

Adding More Events

If a Custom Control requires another event, this is defined within the event object. In the following example, two events have been defined: hoverIn and hoverOut, which are to react to the mouse cursor.

However, new events do not trigger themselves. Rather, they must be actively triggered. Since a MouseHoverIn and Out is desired in our example, the Custom Control must listen to the mouse events.

The SAPUI5 framework also generates new methods for events, which belong to the triggering (fire) of the event. This way, the browser mouse events can be listened to within the Custom Control and the own new event can be triggered (fired).

Conclusion

In this article it was shown that the advantages of Custom Controls compared to a detached jQuery or JavaScript component are enormous. SAPUI5 takes care of the rendering and the existing functionalities without anyone having to deal with it themselves. If existing SAPUI5 controls can be extended by properties or events so that the requirements are met, this can be realised with just a few lines of code. Even completely new Controls can be realised with simple HTML and CSS knowledge. Find out how this is implemented in our next blog post!

Written by Martika Möller

Share Post

More Exciting Topics from our Newsroom

We are one of “Germany’s best employers”

As one of Germany's top 100 employers with renewed 'Great...

Read More

Shortcuts for SAP BW in Eclipse

This blog post explains five simple shortcuts to make working...

Read More

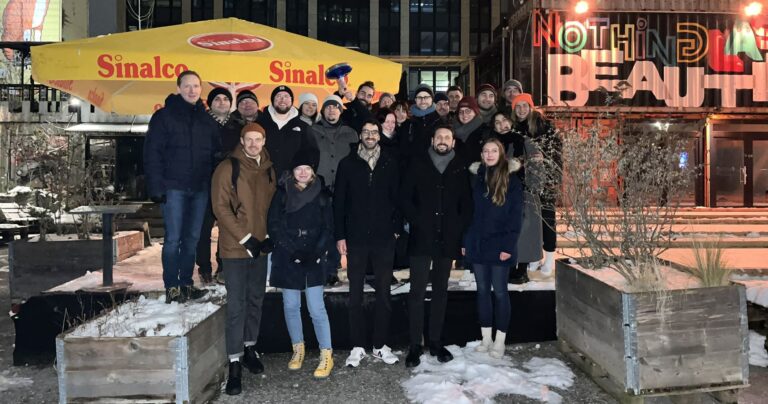
Bavarian Curling with the BIG.Cube

BIG.Cube employees went bavarian curling together after work. Find out...

Read More